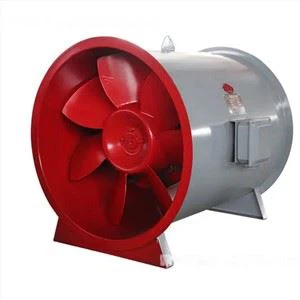
Installing a sawdust conveyor fan on a wall can be a practical solution for effectively managing sawdust and other particulate matter in various industrial and woodworking settings. As a supplier of high-quality sawdust conveyor fans, I understand the importance of a proper installation process to ensure optimal performance and safety. In this blog post, I'll guide you through the step-by-step process of installing a sawdust conveyor fan on a wall, sharing valuable insights and tips along the way.


Step 1: Planning and Preparation
Before you begin the installation, it's crucial to plan and prepare thoroughly. Here are the key steps to take:
- Select the Right Location: Choose a suitable location on the wall where the fan will be installed. The location should be close to the source of sawdust and allow for easy access to power and ventilation ducts. Make sure the wall is sturdy enough to support the weight of the fan and its components.
- Gather the Necessary Tools and Materials: You'll need a variety of tools and materials for the installation, including a drill, screws, brackets, a level, a measuring tape, and a ladder. Additionally, make sure you have the sawdust conveyor fan, ventilation ducts, and any other accessories required for the installation.
- Check the Fan Specifications: Review the manufacturer's specifications for the sawdust conveyor fan to ensure you have the correct model and size for your needs. Pay attention to the fan's power requirements, airflow capacity, and mounting dimensions.
Step 2: Mounting the Bracket
Once you've selected the location and gathered the necessary tools and materials, it's time to mount the bracket on the wall. Follow these steps:
- Mark the Bracket Location: Use a measuring tape and a level to mark the location of the bracket on the wall. Make sure the marks are straight and level.
- Drill the Holes: Use a drill to create holes in the wall at the marked locations. The size of the holes will depend on the type of screws you're using.
- Attach the Bracket: Insert the screws into the holes and attach the bracket to the wall. Use a level to ensure the bracket is straight and level.
Step 3: Installing the Fan
With the bracket in place, it's time to install the sawdust conveyor fan. Here's how:
- Lift the Fan: Carefully lift the fan and place it on the bracket. Make sure the fan is centered and aligned with the bracket.
- Secure the Fan: Use screws or bolts to secure the fan to the bracket. Make sure the fan is tightly secured and does not move.
- Connect the Ventilation Ducts: Connect the ventilation ducts to the inlet and outlet of the fan. Use clamps or seals to ensure a tight and secure connection.
Step 4: Electrical Connection
Once the fan is installed, it's time to make the electrical connection. Follow these steps:
- Turn Off the Power: Before making any electrical connections, turn off the power to the circuit at the breaker box.
- Connect the Wires: Follow the manufacturer's instructions to connect the wires from the fan to the electrical supply. Make sure the connections are secure and properly insulated.
- Test the Fan: Once the electrical connections are made, turn on the power to the circuit and test the fan. Make sure the fan is running smoothly and that there are no unusual noises or vibrations.
Step 5: Testing and Adjustment
After the installation is complete, it's important to test the sawdust conveyor fan and make any necessary adjustments. Here's what you need to do:
- Check the Airflow: Use a smoke pencil or a piece of tissue paper to check the airflow from the fan. Make sure the airflow is strong and consistent.
- Adjust the Fan Speed: If the fan has adjustable speed settings, adjust the speed to the desired level. Make sure the fan is operating at the optimal speed for your needs.
- Inspect the Installation: Inspect the installation to make sure everything is secure and properly connected. Check for any leaks or loose connections.
Step 6: Maintenance and Safety
To ensure the long-term performance and safety of your sawdust conveyor fan, it's important to perform regular maintenance and follow safety guidelines. Here are some tips:
- Clean the Fan Regularly: Clean the fan and the ventilation ducts regularly to prevent the buildup of sawdust and other debris. Use a vacuum cleaner or a brush to remove the dust.
- Check the Belt and Motor: Check the belt and motor of the fan regularly for signs of wear or damage. Replace the belt or motor if necessary.
- Follow Safety Guidelines: Always follow the manufacturer's safety guidelines when operating the sawdust conveyor fan. Wear appropriate safety gear, such as goggles and gloves, and make sure the fan is properly grounded.
Conclusion
Installing a sawdust conveyor fan on a wall is a relatively straightforward process that can be completed with the right tools and materials. By following the steps outlined in this blog post, you can ensure a successful installation and enjoy the benefits of a clean and efficient sawdust management system.
If you're in the market for a high-quality sawdust conveyor fan, we offer a wide range of products to meet your needs. Our 4-72 Flue Gas Dust Removal Circulating Fan is designed for efficient dust removal and circulation, while our 22 Kw Low Noise Backward Curve Turbo Blower Centrifugal Ventilator Fan provides powerful airflow with low noise levels. Additionally, our Streamlining Dust Removal: The Dedusting Centrifugal Fan is ideal for streamlining the dust removal process.
Contact us today to learn more about our products and how we can help you find the perfect sawdust conveyor fan for your application. We look forward to working with you to provide the best solutions for your dust management needs.
References
- Manufacturer's installation manual for the sawdust conveyor fan
- Electrical safety guidelines for industrial equipment
- OSHA regulations for workplace safety