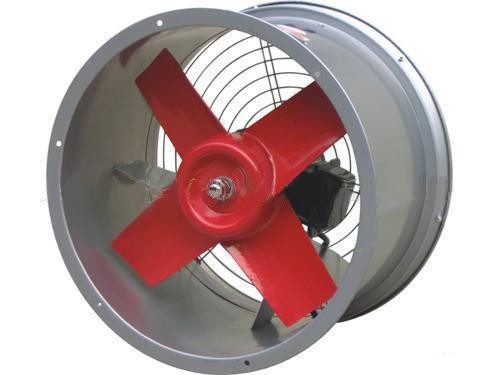
Hey there! As a supplier of Workshop Axial Fans, I've seen firsthand how important it is to keep these fans clean. A clean axial fan not only operates more efficiently but also has a longer lifespan. In this blog, I'll walk you through the step - by - step process of cleaning a workshop axial fan.
Why Cleaning Your Workshop Axial Fan is Crucial
Before we dive into the cleaning process, let's talk about why it's so important. Over time, dust, dirt, and debris can accumulate on the fan blades and in the housing. This buildup can cause the fan to work harder, which in turn consumes more energy. Plus, it can lead to uneven airflow and even damage to the motor. A dirty fan can also circulate dust and allergens in the workshop, which isn't great for the health of the workers.
Tools You'll Need
To clean your workshop axial fan, you'll need a few basic tools:
- A screwdriver: This will be used to remove the fan cover and access the blades.
- A soft - bristle brush: Ideal for gently removing dust from the blades and other parts.
- A vacuum cleaner with a brush attachment: Helps to suck up loose dirt and debris.
- A bucket of warm, soapy water: You can use a mild dish soap for this.
- A clean, dry cloth: For wiping down the fan after cleaning.
Step 1: Safety First
The very first thing you need to do is turn off the power to the fan. This is super important to avoid any risk of electric shock. Locate the power switch or unplug the fan from the outlet. You don't want to be cleaning the fan while it's still running!
Step 2: Remove the Fan Cover
Use your screwdriver to carefully remove the screws holding the fan cover in place. Set the screws aside in a safe place so you don't lose them. Once the screws are out, gently take off the fan cover. You'll now have access to the fan blades and the interior of the fan.
Step 3: Vacuum the Fan
Take your vacuum cleaner with the brush attachment and start vacuuming the fan blades and the housing. This will help to remove any loose dust and debris. Make sure to get into all the nooks and crannies, especially around the edges of the blades and in the corners of the housing.
Step 4: Brush the Blades
After vacuuming, use the soft - bristle brush to gently brush the fan blades. Start from the center of the blade and work your way out to the edges. Be careful not to bend the blades as you brush. This step will help to dislodge any stubborn dirt that the vacuum might have missed.
Step 5: Clean the Blades with Soapy Water
Dip the clean, dry cloth into the bucket of warm, soapy water. Wring it out so it's not dripping wet. Then, wipe down each fan blade with the soapy cloth. This will remove any remaining dirt and grime. If the blades are really dirty, you can also use the soft - bristle brush to scrub them gently while they're wet.
Step 6: Clean the Fan Housing
Don't forget about the fan housing! Use the soapy cloth to wipe down the inside and outside of the housing. Pay special attention to areas where dust tends to accumulate, like the vents and the corners.
Step 7: Rinse and Dry
Once you've cleaned all the parts, rinse the cloth in clean water and wring it out. Then, use it to wipe down the blades and the housing again to remove any soap residue. After that, use a dry cloth to dry everything thoroughly. Make sure there's no moisture left on the fan before you reassemble it.
Step 8: Reassemble the Fan
Put the fan cover back on and secure it with the screws you set aside earlier. Make sure the cover is properly aligned and the screws are tightened securely.
Step 9: Power On and Test
Now that the fan is reassembled, plug it back in or turn on the power switch. Turn on the fan and check if it's working properly. Listen for any unusual noises and make sure the airflow is even.
Wall Axial Fan Option
If you're looking for a different type of axial fan for your workshop, we also offer Wall Axial Fan. These fans are great for saving floor space and can be easily installed on the wall. They provide excellent ventilation and are a popular choice among our customers.
Regular Maintenance Tips
To keep your workshop axial fan in top condition, it's a good idea to clean it regularly. Depending on how dirty your workshop is, you might want to clean the fan every few months. Also, check the fan for any signs of wear and tear, such as loose screws or damaged blades. If you notice any problems, it's best to address them right away.
Conclusion
Cleaning your workshop axial fan is a simple yet important task that can make a big difference in its performance and lifespan. By following these steps, you can ensure that your fan runs smoothly and efficiently. If you have any questions about cleaning or if you're interested in purchasing a new workshop axial fan, don't hesitate to get in touch. We're here to help you with all your ventilation needs. Whether you need a replacement fan or want to upgrade to a more powerful model, we've got you covered. Contact us today to start the procurement discussion and find the perfect axial fan for your workshop!

References
- General knowledge on axial fan maintenance from years of experience as a workshop axial fan supplier.
- Industry - standard guidelines for cleaning and maintaining industrial fans.